Close to 30% of domestic plumbing service calls begin with a malfunctioning stop. This underscores the significance of the right control valve. It’s as critical as the appliance it feeds.
Best Place To Buy 1 2 By 3 8 Angle Stop
This manual provides a practical look at the chrome compression stop valve. It outlines its definition, its role in contemporary plumbing systems, and the perks of professional installation. DIYers and pros will locate useful advice for various applications, ranging from bathroom sink stops to dishwasher and laundry connections.
We cite professional guides and specific products, including plated brass units with internal seals. This assists in understanding how they fit with common stub-outs and water lines. Whether you are undertaking a DIY repair or buying parts from distributors like Installation Parts Supply, knowing about the compression stop valve is crucial. It ensures you choose the best control fitting for your project.
Grasping The Basics Of Angle Stops And Compression Parts
Angle stops are small isolation valves that change flow direction at a right angle connecting a stub-out pipe and the riser tube. A standard 1/2″ stop valve is located under sinks and in back of commodes. It offers a point-of-use shutoff without shutting off the whole house. Homeowners and pros utilize these stops for standard service, changing faucets, and fast shutoff during home repairs.
Angle stop valve functions:
- Delivers a local shutoff at lavatories, sinks, toilets, dishwashers, and washing machines.
- Fits restricted zones where a straight valve is not feasible.
- Available in typical sizes such as 1/2 inch angle valves or smaller 1/4 options.
The sealing mechanism of compression fittings
Compression valves rely on a compression nut and sleeve that squeeze onto the pipe material (with a support insert) to create a mechanical joint. The compression-type valve fits without soldering, which speeds installs and makes easier future valve replacement. Technicians tighten the nut to seat the ferrule against the stub-out; the ring grips and seals the tubing.
Why choose compression fittings
- No fire or soldering makes compression ideal for replacements and tight access areas.
- Stops like the standard angle valve can be swapped without shortening the pipe if the existing hardware are undamaged.
- This method is reliable with copper pipes and PEX tubing provided you use proper inserts or ferrules.
Compression versus sweat and threaded connections
Compression avoids soldering and is quicker for most on-site fixes. Sweat fittings give a fixed connection that some plumbers prefer for new construction. Threaded setups, such as twisting a stop into an female threaded elbow, offer serviceability but demand careful positioning and sealing. Debates on forums often focus on hidden threaded pipes against soldered adapters and aesthetic issues when piping is exposed under sinks.
| Fitting Method | Advantages | Disadvantages |
|---|---|---|
| Compression (1/2″ stop) | Fast setup, no solder, simple to swap, compatible with copper and PEX | Ring might need replacing if taken apart often; less permanent than solder |
| Sweat | Durable, solid bond, favored for longevity | Needs a torch, fire risk, longer downtime during installation |
| IPS Joint | Serviceable, secure mechanical connection, good for repeated maintenance | Requires proper sealing, risks with buried nipples, can be bulky in tight spaces |
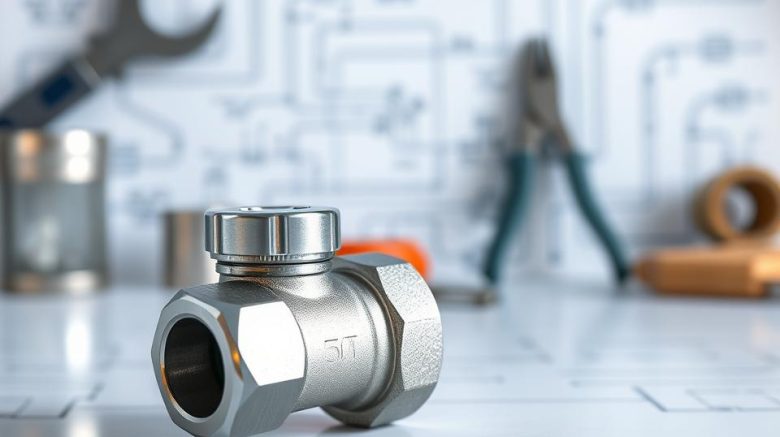
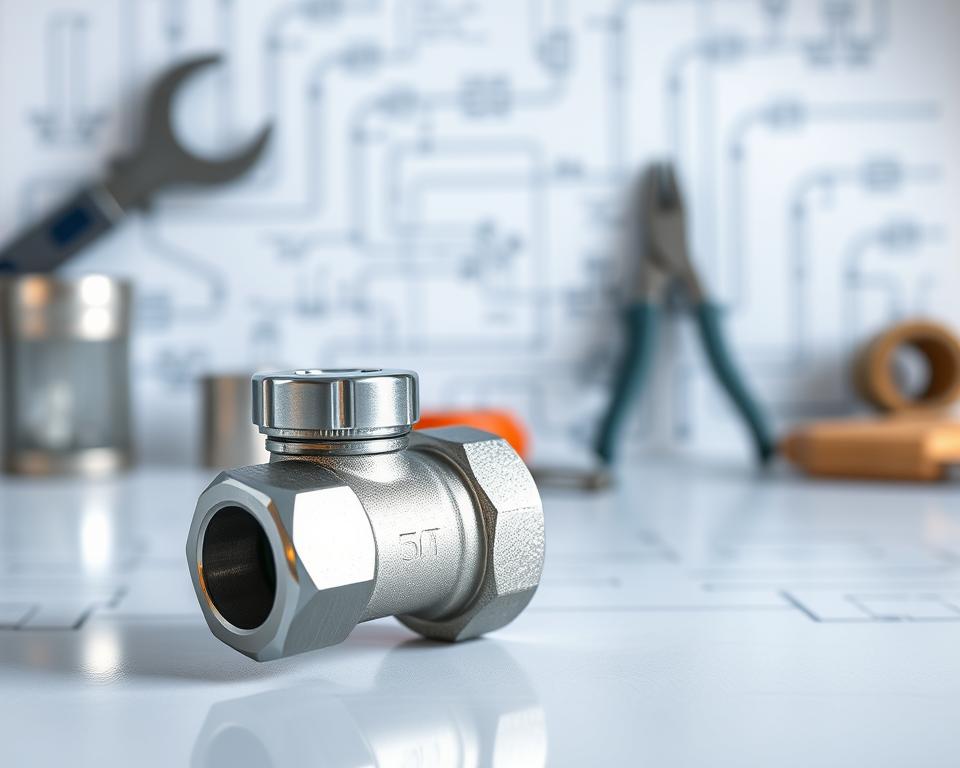
Chrome Plated Compression Angle Stop Valve
The chrome-plated compression stop is a perfect blend of looks and performance for visible plumbing. It is built to meet the needs of both homeowners and plumbers, due to its brass body with chrome finish. This feature makes it a common selection for visible supply shutoffs and fast fixes.
Overview Of Chrome-plated Brass Construction And Finishes
High-quality angle stops boast solid brass construction with a chrome-plated finish. This coating matches sink fittings and offers a polished look that resists tarnish. Brass is selected for its durable core material, making sure it is safe for drinking water applications.
Manufacturers such as Schell, Moen, and others supply chrome brass models. They also offer models with integrated seals. Listings detail the surface finish, sizes, and whether the valve comes with a serviceable packing or a pre-installed nut.
Vital Features: Long Life And Corrosion Protection
Brass is known for its durability against corrosion and capability to stop dezincification in household water conditions. The chrome finish provides an additional protective barrier. It maintains the valve matching with taps and accessories.
Integrated seals negate the need for additional pipe dope during setup. High-quality internal parts and serviceable packing ensure a long cycle life. They provide reliable shutoff through many cycles.
Common Installation Spots For Chrome Valves
Chrome compression angle stop valves are great for under bathroom sinks, at toilet connections, and inside kitchen cabinets. Their compact 90-degree turn is suitable for confined areas. They’re also great for corner connections.
Popular selections include the 1/2-inch compression stop or a 1/2×1/4 model, dictated by the supply tube size. Listings often include chrome finish photos, notes on integrated seals, and price tags. This clarifies customer expectations for bath accessories and plumbing fixtures.
Angle Valve Sizes And Connection Standards
When picking an angle stop, comprehending size markings is crucial. Manufacturers mark connection sizes as nominal dimensions, such as 1/2 x 1/4 angle stop or 1/2 x 1/2 angle stop valve. These labels signify matching with various units and supply lines.
The label 1/2 angle stop usually means a 1/2″ inlet, designed to connect to supply stubs. This dimension can fit a reduced output, like a 1/4 inch outlet, for precise fixture connections. A 1/4″ valve is often used for skinny supply lines or device connections.
In certain instances, a 1/2 by 1/4 valve is chosen where the pipe is full-size copper or PEX, but the fixture uses a smaller tube. For setups where both supply and outlet match in size, a 1/2 by 1/2 stop is recommended. Always verify the size pairing prior to purchase.
Compression-specific valves are preferred for their simple installation. A 1/2″ comp valve fits regular 1/2 inch pipes with the correct ferrule or insert. Most stores sell a 1/2 compression angle stop, furnished with a compression nut and ferrule for quick install.
Note well that some valves are marked in metric sizes, such as DN 15 for a 1/2 inch equivalent. Make sure the part corresponds to the supply pipe and flexible hose fittings in the home. Check whether the item includes an integrated seal or if a new ring is necessary to ensure smooth install.
Choosing The Right Valve: Compatibility And Measurements
Choosing the right valve begins with accurate measuring and making sure the connection type fits the wall pipe. Examine the stub for its outer dimension on copper lines. Inspect for screw threads and determine if the pipe terminates in a drop-ear fitting or a bare copper end. This simple check can prevent costly returns and conserve time during installation.
How To Measure Stub-outs And Determine Angle Valve 1/2 Compatibility
Measure copper stub-outs by their outer diameter. A nominal 1/2″ copper stub-out is roughly 5/8″ OD usually (nominal vs actual). If threads are present, determine if they are female or male. When using compression, make sure the smooth area and protrusion allow enough room with the ring and nut.
Plumbing standards often prefer drop-ear elbows or sweat fittings for stability or consistent ferrule seating. Align these details to the valve type to ensure the angle valve 1/2 fits without requiring extra parts.
Identifying 1/2 x 1/2 Compression Shut Off Valve Vs Other Types
Examine packaging and specifications thoroughly. A 1/2×1/2 valve will list both inlet and outlet as 1/2 inch size. On the other hand, a 1/2 x 1/4 angle stop will have a reduced output for fixture tubing or a flexible connector.
During replacement for a retrofit, compare the outlet size to the fixture supply hose. Ensure the body type is correct. Many plumbers keep separate chrome valve stocks for exposed locations and standard brass for concealed valves.
Verifying Integrated Seals And Pre-fitted Nuts
Inspect product details for ferrules, nuts, or integrated seals. Some types, like Schell products, feature pre-assembled nuts or auto-seal features. Such designs simplify installation and eliminate the need for Teflon tape.
Compression models often specify if the valve includes preinstalled ferrules or a factory-fit nut. Select valves with documented integrated seals for a leak-proof, fast setup, which is crucial in small spaces.
Guide To Installing Leak-Resistant Angle Stop Valves
Begin by carefully prepping the pipe. Use a high-quality tube cutter to cut the tube straight. Make sure the pipe end is deburred and squared for good seal contact. Put the hardware on the tube in the right order prior to fitting the valve. Clean the threads of elbows or female adapters and check the depth to avoid stripping threads.
To secure a compression fitting angle valve, gently push the ring into the valve body while tightening the nut. Keep the valve body steady and tighten in small increments. This guarantees even seating of the ring. Follow instructions, typically hand tight plus 1/4 to 1/2 turn with an adjustable wrench.
With chrome finishes, protect its finish. Chrome surfaces scratch easily. Employ soft-jaw pliers or a rag to avoid scratches while tightening. Go slow and test the joint. Excessive force can deform the ferrule or damage threads, causing leaks.
Compression joints rarely need thread tape. Apply thread sealant or tape only on NPT threads, as directed. Self-sealing valves or self-sealing designs may not need tape or sealant at the connection point.
To ensure a leak-free install, pressure test the line. Inspect the compression nut and ring for leaks. If you see a drop, tighten a tiny bit more. If dripping persists, disassemble, check, put on a new ring, and reinstall.
Experienced plumbers like sweat or threaded connections for permanent installations. Industry habits frequently utilize drop-ear elbows for easy valve swapping without shortening the pipe. Select the technique that matches the accessibility and long-term serviceability.
Tools And Materials For DIY Plumbing Repair With Chrome Valves
Using the correct gear and supplies is vital to a good home repair. Clean the work zone, confirm the valve model, and get everything ready before shutting off the water.
Must-have tools
An crescent wrench and a backup wrench are necessary for holding fittings while you turn the valve. A sharp tubing cutter is essential for smooth cuts on copper tubing, reducing leak risks. Use a deburring tool or reamer to remove burrs after cutting. A protective cloth or soft-jaw wrench will safeguard the look during tightening. Flaring tools, though less common for compression joints, are handy for flare fittings.
Needed supplies
Always install new ferrules and new nuts when changing a valve. Keep washers, O-rings, and integrated seals on hand for models that require them. Choose manufacturer-specific ferrules for the best fit and leak prevention.
Safety procedures and shutoff steps
Before loosening any connection, confirm the correct branch shutoff or house main. Turn on the faucet and valve to drain remaining water from the pipe. When near an electric heater or disposal, turn off nearby appliance power. Use safety glasses and check for pressure before unscrewing.
Buying parts
Parts houses like Installation Parts Supply sell bulk compression nuts, new ferrules, and chrome valves. They supply contractors and homeowners doing multiple installs. Ordering the correct sizes and makes upfront minimizes callbacks and keeps the job moving.
Solving Common Angle Stop Problems
Small leaks and stuck parts are frequent when installing valves. This section walks you through real-world tips for finding leaks. It also discusses dealing with wall-mounted stub-out dilemmas and ways to prevent issues with a hidden pipe in the wall.
Tracing leaks
Identify the origin: inlet, outlet, or packing. A weep at the compression nut usually points to ferrule seating, improper torque, or a damaged ferrule.
If the nut shows a slow drip, back it off, pull the valve off, inspect the ferrule and pipe end, then reseat or replace the ferrule and nut. Remove burrs or deformity on the pipe before putting it back.
Units with seals must be checked visually. If the seal is torn or moved, replace the valve. When fixing leaks, document the exact location to avoid repeated disassembly.
Stub-out issues
Plumbers debate threaded elbow versus sweat fittings at rough-in. A threaded elbow allows threading and be changed without cutting the stub-out. This approach supports a long-term maintenance plan for future service.
Soldered joints create a durable, permanent joint. They lower risk of leaks inside the wall, but soldered connections complicate replacement. Choose sweat fittings when permanence and low maintenance are priorities.
Problems with hidden nipples
A buried nipple can seize or corrode inside the wall, causing a frozen valve and difficult repair. Advice from veteran plumbers stresses careful rough-in planning to avoid this trap.
Recommended practice is to use drop-ear elbows, a exposed threads, or a solder adapter at rough-in so the connection never becomes permanently buried. This forethought reduces the need to break open walls for future swaps.
Fixes and prevention
- Change rings and nuts if they look bent; brass rings can warp under over-tightening.
- Recut and deburr tubing when the pipe end is damaged; a smooth end helps the seal.
- Choose parts during piping that permit serviceable swaps to maintain a leak-resistant angle stop valve approach.
| Issue | Likely Cause | Solution |
|---|---|---|
| Weep at compression nut | Bad seating or damaged ferrule | Back off nut, inspect and replace ferrule and nut, trim pipe, tighten correctly |
| Packing leak | Packed stem wear or misaligned bonnet | Shut water, tighten packing nut slightly, replace if needed |
| Seized valve | Rust or seized threads inside wall | Cut to fitting, use drop-eared 90 or adapter at rough-in |
| Frequent leaks after solder | Poor solder joint or dirty flux | Desolder, clean, sweat fittings properly or use threaded where serviceability matters |
Standards, Certifications, And Model Examples
In valve selection, approvals are crucial. NSF/ANSI 61 ensures drinking water safety, whereas NSF 372 ensures lead-free status. ASME and CSA standards are critical for projects subject to regional codes. Catalog descriptions detail flow ratings and DN sizing, where DN 15 means a nominal 1/2 inch connection.
It is vital to check features to meet project demands. Sealed versions eliminate the need for additional tape or sealant. Built-in check valves and dual flow limiters address specific code or fixture requirements. The design of the packing gland and included hardware influences both installation time and leak resistance over time.
The Schell DN15 model featuring a seal exemplifies how manufacturers present finish, dimensions, and certifications. Consumer ratings and Best Sellers rankings are valuable for checking durability in plumbing fixtures. Established brands frequently have combination valves with check valves or limiters for particular applications.
Wholesale distributors make buying easy for pros. Firms such as Installation Parts Supply source chrome compression angle stop valves from top brands. They verify certifications and warranty coverage. It’s important to compare wholesale and retail prices, check availability, and ensure certs fit project requirements before bulk buying.
Check these points when evaluating valve options:
- Certs: NSF 61/372, ASME, CSA as needed.
- Specs: integrated seals, check valves, flow limiters, packing gland design.
- Sizing: Metric/Imperial size, connection type, hardware.
- Buying: stock, warranty, supplier trust.
Maintain logs of certification numbers and batch details when purchasing. This documentation helps with inspections and future maintenance. Retail listings and supplier books usually provide spec sheets for each chrome compression angle stop valve, helping with matching products to job requirements.
Maintenance, Longevity, And Replacement Signs
Ongoing upkeep is essential to keeping valves in top condition and making them last. A simple inspection biannually can spot problems before they get worse. It helps to note resistance, small leaks, or corrosion to monitor condition.
Replacement signs
Leaks at the nut or persistent dripping from the stem show it’s time for a replacement. Corrosion or pitting of the chrome finish weakens the metal, causing failure. If a 1/2 angle stop or 1/4 angle stop won’t turn or sticks, it’s a clear sign that it needs to be replaced.
Routine maintenance tips
Cycling valves by opening and closing them a few turns helps prevent seizing. Clearing aerators and supply lines periodically cuts down debris and mineral buildup. In areas with hard water, consider adding a softener or adding a filter to reduce buildup that kills valves.
Compression ferrules and joint care
Compression ferrules crush under torque and should be replaced if you open the joint. Using old rings often leads to leaks at the joint. Always fit new hardware during any repair or replacement to guarantee a seal.
Upgrading valves
Persistent leaks, frequent repairs, or complicated installations are good reasons to consider upgrading. Explore integrated-seal models, combination valves with built-in check valves, or changing from nipples to solder adapters for easier future service. Upgrades can boost life and cut outage time for both homeowners and plumbers.
Expected life
Good chrome valves can last decades under normal conditions. The real life depends on water quality, how often used, and installation quality. Spotting issues of failure signs and routine checks can maximize the performance of a 1/2 angle stop or 1/4 angle stop, minimizing unexpected failures.
Budgeting And Purchasing Guide For Valves
Choosing the right valve is a balance of cost, needs, and value. Buyers consider several factors. These include the material, quality of chrome plating, and whether the part includes integrated seals or check valves. A higher-end 1/2 x 1/2 angle stop valve, made from solid brass with a thick chrome finish, will last longer than cheaper alloys in visible bathroom installations.
Retail purchases are suitable for small repairs needing one part. Pros, on the other hand, like wholesalers for their bulk rates and stock. Installation Parts Supply offers a wider selection of approved valves and better warranties. This lowers the project cost when buying multiple valves.
Cost planning should consider more than just the valve’s price. Include the cost of hardware, adapters, and tools for swap-outs. For bathroom hardware projects seen by users, coordinate the look and trim to the faucets to look professional. For cabinet valves, focus on function and dependability over looks.
Comparing sources, verify warranties, returns, and papers. Distributors can lower per-unit cost, but some retail lines give lifetime guarantees that balance the cost. Factor in saved labor using better valves when budgeting.
Use this quick checklist when buying:
- Material and plating quality for long life and looks.
- Presence of integrated seals or checks to simplify install.
- Compatibility with existing stub-outs or adapters to avoid rework.
- Supplier reputation and warranty, especially from suppliers like Installation Parts Supply.
To summarize, balance immediate cost vs long-term value. Investing a bit more in a quality valve or a robust 1/2 compression angle stop can reduce repairs and improve results on plumbing projects.
Conclusion
Picking the correct valve requires care. First, check the sizing. Knowing compression basics is key. Lastly, follow established installation practices to ensure a durable, leak-free stop.
Whether you’re tackling a home repair or a pro job, certain steps are critical. Always replace ferrules when servicing. For simple installs, consider valves with integrated seals. Torque it right and sealing method to get a good seal.
Proper tools and careful work are vital for a good install. This method lowers leak risk after installation. When purchasing, turn to trusted distributors like Installation Parts Supply. They offer quality valves and integrated-seal models, such as the Schell DN15-style, which meet potable water standards.
Using proper parts, measurements, and skill, both homeowners and professionals can achieve durable, good-looking, and reliable setups. This guarantees years of use from your chrome stop valve.